Perspective grids in Photoshop
To set up my canvas I first selected the Film and tv layout tab, then I selected my canvas size to being 1080p. This did bring up some guides on the screen, this isn't necessarily useful for what I needed to do so to get rid of these guides I selected the view tab, then pressed clear guides. I did however need rulers, so I used to shortcut Ctrl-R to bring up rulers on all sides of my canvas.
In softwares such as Adobe Illustrator, the outside grey bit of the canvas can be used to place images or other tools that are needed but not needed to be seen. This is called a pasteboard. Adobe Photoshop does not have a pasteboard so we will need to make one, this is so we can put the vanishing points outside of the canvas. To do this we need to increase the image size, we do this by going into the Image tab, pressing canvas size, changing pixels to percent then increasing by 300 Width and 200 Height. I also changed the colour of the canvas extension to differentiate my canvas to my pasteboard.
By dragging down from the top ruler I created a blue line that I could drag into place, this will be representative of my horizon line. If my horizon line isn't properly aligned I can drag over the blue line and move it into place. As a reminder, to create a straight line you can press shift whilst drawing, and to select something, the Shortcut is V.
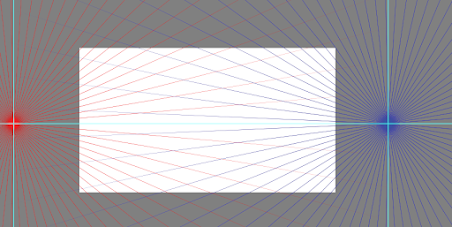
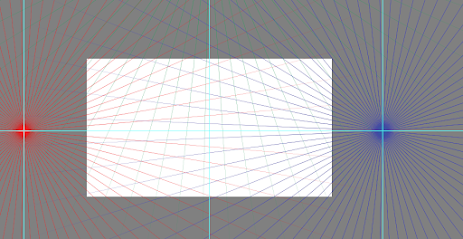
Now that I have my horizon line placed, I need to drag from the left ruler to place my vanishing points within the Pasteboard. The most effective way to draw in my perspective grid is actually to use the polygon shape tool. First make sure the fill properties are red and the stroke is empty [this is the option with the red line through a box]. Go into settings and click from centre, and freeform. This will allow you to draw your polygon from the centre point where your mouse is. Then change the star ratio to 1%,this will make a star as opposed to a polygon. Before dragging the polygon out, make sure to change the sides to at least 75. Then you only need to copy and colour this duplicated star to blue and drag it over to the other vanishing point. This creates a 2 point perspective grid.
To make a 3 Point perspective grid, you need only make a third vanishing point with the ruler and then drag in another polygon. It is also a good idea to make all of your vanishing points a different colour, this makes it easier to distinguish what you're looking at. I also decided to delete my rulers so that I could better understand what I'm looking at.I also transferred my knowledge of the law of diminution into photoshop to draw this fence.
For my example I used the grid to draw a thatched cottage, I found this task to be much easier than I anticipated but I think drawing such a squat house in this perspective did warp some of the features like the door to look out of perspective and change, to fix this next time I should either bring the door closer to the camera, draw something taller or change the height of my third vanishing point to minimize the distortion.


Comments
Post a Comment