Maya Rigging part 3 [The spine]
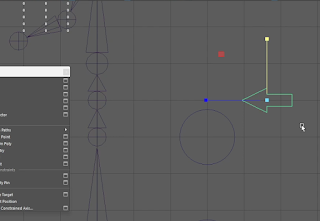
To create our joints for the spine we will first need to go into the side view and either count squares or use the locator to choose the height of the character. For this instance we will count, going up 12 units to decide where the head will be. Then we need to go into the create menu and find the locator, place this at the spot we counted up to and call your locator Head_Lock. It should now look like the image below.
Make sure that you have returned to rigging menu and find the Skeleton tab, then click create joints. We will need a joint on the pelvis, place this by holding down x. From here, come up 2 units make a joint, then come up another 2 units and make another joint, then Come up 3 units and make another joint, and finally come up 1 unit and make another joint.
You do not need a joint for every vertebrae in your back, these will do. Make sure to rename your joints, in order from bottom to top they should be: [C_Pelvis_2_JNT], [C_Lumbar_1_JNT],[C_Lumbar_2_JNT], [C_Chest_JNT], [C_Neck_1_JNT].
Then go back into the create menu and select Nurbs primitives, then Nurbs circle. This will be another control. We need to snap this control to the pelvis with V and then move it back to behind the geometry if you are working with a model, if not, estimate how far back the geometry will be [3 units usually] and place your nurbs circle there. Then rotate z axis 90 degrees so we can see it, and then scale down to 0.75.
Always make sure to clean up your transformations, by freezing transformations and deleting history. Then by using D and V, move your control pivot point to the pelvis joint. You will then need to duplicate this 3 times and move your control pivot up to each corresponding joint on the chain.
Rename these new controls in order from bottom to top : [C_Pelvis_2_CTRL], [C_Lumbar_1_CTRL], [C_Lumbar_2_CTRL], [C_Chest_CTRL].
We will then need to use constraints, point and orient in a similar fashion to how we did last time. Go to your Constraints menu, it may be easier to undock the menu so you can access it quicker. Make sure that both point and orient have their maintain offset selected, then select C_Pelvis_2_CTRL whilst pressing q to get rid of pivots and then Shift select the adjacent joint. From here we need to select point and orient and check the translations are highlighted. Once everything looks right, repeat this process with all the joints and controls. (Mine was not working like the video showed and I was unable to reach out for help to fix my rig so screenshots from here forward will all be taken from the instructional video)
We now need to set up the hierarchy system using parents. Always work from the top down, for example: first select chest and lumbar 2 and press P to parent, then lumbar 2 & lumbar 1 and press P to parent, and finally lumbar 1 & pelvis and press P to parent. Now that you have done this you should be able to move the spine much more fluidly
Before moving onto the head joint remember to parent pelvis control to the horizontal pelvis control we made last week. This is the one i have highlighted in red.


Comments
Post a Comment